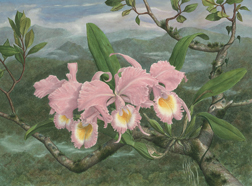

Once again, it is time to repot many kinds of orchids. For new orchid hobbyists, repotting can be a scary task. Once it is done successfully a few times, this gets to be more of a chore than something to be dreaded. Most orchids with bulbs, e.g. cattleyas, dendrobiums, oncidiums, etc should be potted as soon as they start their new growth, which is now. Many species and hybrids have or are about finished flowering, another good time to repot. The biggest issue for many new hobbyists is “How do I know it is time to repot my orchid plant?” Orchids are not like other plants in that they prefer to be left alone and not repotted constantly if the medium they are in is in good shape and not turning into something that looks like garden soil. The following is some basic advice.
Carefully grab the plant (not the pot) and lift gently. If the plant
starts to come out of the pot it has either lost its roots or was not
well established. Either way, it needs repotting. If the medium has
turned to “mush” or looks like potting soil, it is time to repot. If the
plant has bulbs that are out of the pot and the medium looks like soil
it is time to repot. Never repot because you want to divide the orchid.
That may be a consequence of repotting, but never repot for that reason.
The larger the plant, the better flowers you will see next year. The
following is the process I follow for any orchid that has bulbs.
First, I remove the orchid from the old pot and cut the roots about 2-3
inches from the rhizome. Few roots survive repotting and cutting these
off now avoids potential rots later. All roots that are black and
clearly dead are removed entirely. Next, I use a fine jet of water to
remove any particles of the old medium from the remaining roots. The
same jet of water is used to wash any brown tissue from the bulbs. If
you have scale on an orchid, a fine jet of water removes scale and does
not harm the plant or spread disease. Be sure to wash under the rhizome,
too, because scale can hide there and reappear later on your newly
repotted orchid. This is a very effective way to get rid of scale in a
small collection. If the rhizome was cut or there are any cut surface,
sprinkle the wound with cinnamon or other topical fungicide and let it
dry. Set the orchid plant in its new pot without medium and sit it in a
relatively dry shady place for a week or two. After your orchid has
dried thoroughly, place it in its new pot and add medium. Most growers
put some large material, e.g. lava rock, plastic peanuts, etc, on the
bottom of the pot to enhance drainage and then add the medium.
The new pot should allow your orchid to grow for two years without
growing out of the pot, so place the old growths at the pot edge and new
growths in the center. It may seem like the pot is too small for
dendrobiums if you follow the two year rule, but dendrobiums like to be
pot bound and will grow best if new roots quickly contact the side of
the pot. Small wires that attach to the side of the pot (pot clips) and
hold the rhizome in place may be necessary if the orchid does not have
many roots. My preference is to use a stake and tie one of the bulbs
tightly to it and then fill the medium around the orchid and roots,
pressing down on the medium to be sure there is tight contact of the
orchid with the medium. This is a necessity if your orchid is to grow.
If the rhizome wobbles, roots will be damaged each time the plant moves
when watered.
Mist the plant lightly until new growth appears. If your timing is
right, new roots will begin to appear soon, indicating that your orchid
is ready to grow and that it is time to return to your regular regimen
of fertilizing and watering. The rule of thumb is; if you are not sure
of the proper size pot for your orchid, err on the side of the pot being
too small.
Phalaenopsis, paphs and phragmepediums do not have pseudobulbs are
treated differently. Repotting orchids without pseudobulbs will be
discussed in the next column.